Today, we want to share a fun and easy wood DIY wood helicopter project for kids. If you have some spare MDF board lying around from past projects, this is the perfect opportunity to put it to good use.
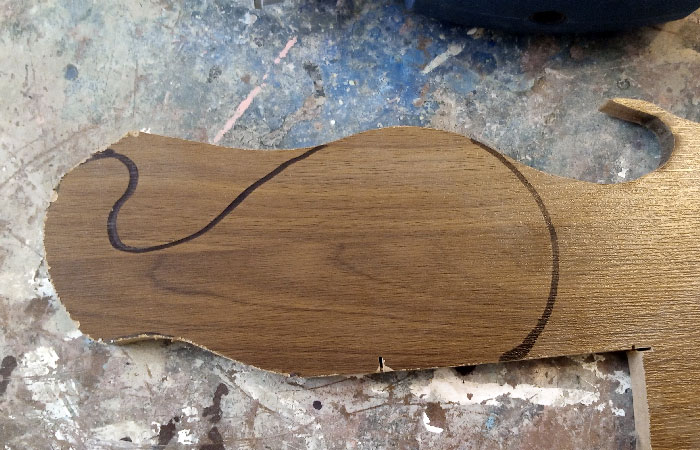
To get started, simply draw a reference design with a permanent marker onto the MDF board. It may look like a whale now, but trust us, with a little creativity and hard work, it will soon transform into a beautiful wooden helicopter.
This project is great for getting kids excited about DIY and helping them develop their creativity and problem-solving skills. Plus, it’s a fun and rewarding way to spend a rainy afternoon.
So grab some MDF board and a permanent marker and let the fun begin! Your kids will love creating their own unique wooden helicopter, and you’ll love seeing their excitement and pride when it’s finished.
Happy creating!
Step 1 – Wood Cutting
The shape was cut out of mdf board with a jig saw cutting tool. (dont use power tools, without training)
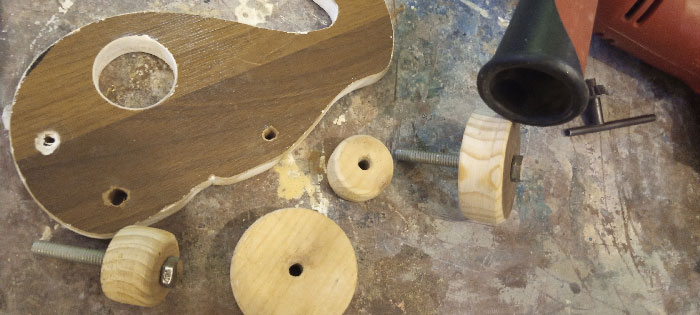
Used hole saw to drill holes, from whom we are going to make wheel, for this part, used wood for reliability, since mdf might break easily in small size, also smooth and rounded look was desired. Used a 4 inch wide by 1 inch thick wood board.
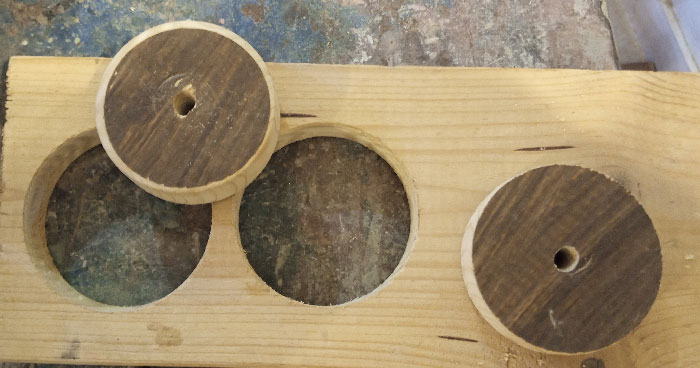
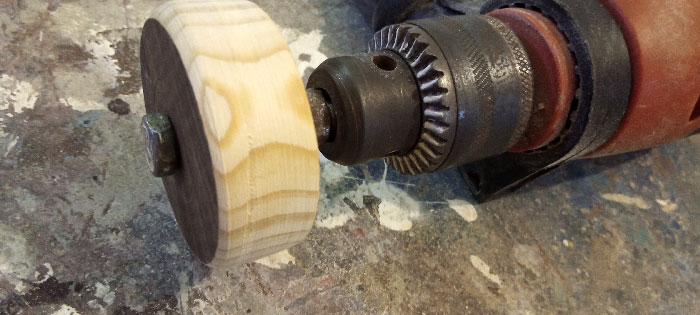
To create a smoother and more rounded finish on a bolt, start by inserting it into a hole and securing it in a drill machine. Then, use sandpaper to sand the bolt until it has the desired appearance. This will not only give the bolt a polished look, but it will also help to remove any rough or jagged edges that could potentially cause problems during use. By taking the time to carefully sand the bolt, you can ensure that it is both functional and aesthetically pleasing.
The body and wheels of this project are now ready for the next phase: coloring and finishing. To add an extra touch of detail, a hole was also drilled into the body to serve as a window. In addition, a hole was drilled at the front of the body to allow for a thin rope to be inserted, allowing the finished project to be easily moved or transported. With these final touches added, it’s time to move on to the coloring and finishing process, which will give the project its final look and protect it from wear and tear.
Painting the wooden helicopter
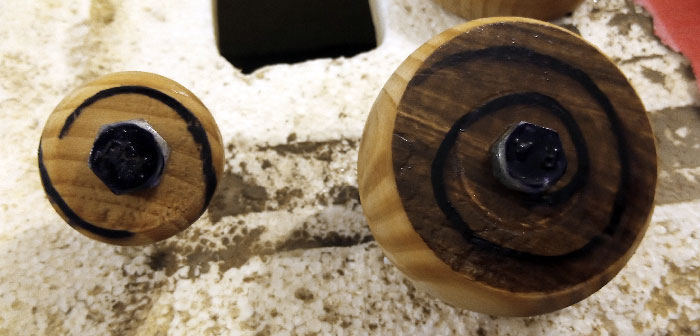
To add some extra details to the project, a spiral design was created using a permanent marker. The wheels were then sprayed with lacquer clear varnish to preserve the natural wooden appearance and protect them from damage. This added step not only enhances the overall appearance of the project, but it also helps to ensure that it will last for years to come. Whether you’re looking to create a functional item or a decorative piece, these finishing touches can make all the difference in the final result.
Rest of wood helicopter was painted with red spray paint. Do not make my mistake, spray thin layers or it will peel off ( wanted to get it done quickly to give surprise to kids 😉 . Sanded the mistake and started again, with thin layers of paint, and more patience. This will be placed in sunlight in morning for better curing. 24 hours time is plenty of time for curing paint.


So this is the final result for the wood helicopter project. Kids are super excited and running around with it. Mission Accomplished ;). See more of our DIY projects.